April 23, 2013

Protect Facebook Photos with McAffee Social Protection


McAffee has launched a new service called McAffee Social Protection, and it’s designed to protect your Facebook photos’ privacy. Here’s how to use it.


Protecting your photos with McAffee’s service will make sure nobody can download, share or print the photos you post on Facebook. It also includes facial recognition so you know when someone posts pictures of you and doesn’t tag you.
It uses a browser extension that only works on Firefox 8 or higher / Internet Explorer 8.0 or higher on a computers running Windows 7 Home Premium or higher. I would expect it’ll a Chrome version soon.
First, go to this address and decide who can see the posts the app makes on your profile, and click Go to App.

Now download and install what McAffee calls Photo Viewer.

Installation is straight forward following the install wizard. It’s installed for IE and Firefox and requires a restart of both browsers.

The app page displays a control panel that lets you to post protected photos, and see protected photos from friends who will need it installed too.

When you click Upload and Protect Photos, you’ll be asked to approve the app’s permissions.

Now you can choose a photo and upload it, then decide who gets to see it.

Friends that have the app installed can see your photos when they access the app, in the My Friends’ Protected photos tab. But they can’t download them or print them and it all turns black if you try to get a print screen.

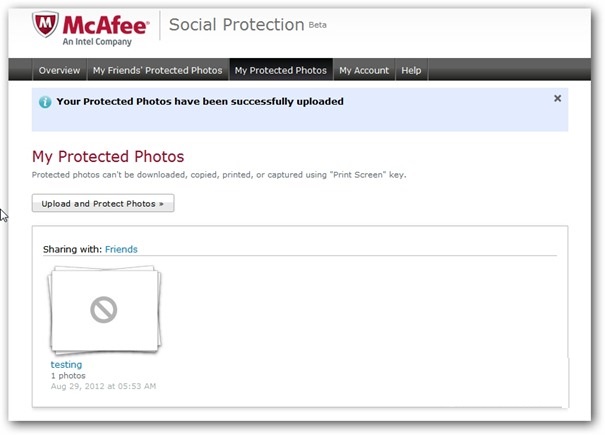
You get a notification when one of your photos finishes uploading, but clicking it only shows a blurred notification of the photo. Uploaded photos don’t show up on Facebook walls.
This might seem like a drastic solution since the whole purpose of Facebook is sharing, but works great if you want to make sure some photos don’t end up in the wrong hands. The service is still in beta so expect a few bugs, but in my testing it worked well overall.

Online Security: Check if Your Password Has Been Compromised


Each year, thousands of accounts are compromised by hack attempts on companies and online services. Here’s how to check if your password has been stolen, and whether it’s time to change it.

First go to Should I Change My Password. Enter your email address and click Check It.
After processing your request, it’ll show you if your password is safe or not. It compares it against a number of databases that have been released by hackers.
In this instance, my email password came back as safe.

If it has been compromised, it will let you know when and how many times. It also advises you to change the password along with other quality password advice.

If you have multiple email accounts, the service allows you to check up to 10 at once.

For more groovy password advice, make sure to check out how to create a secure password you’ll remember.
Whatever you you do, make sure it’s not one of this years 25 worst passwords.

April 16, 2013

How To Share and Collaborate With Google Docs (Word,Excel)

  1. Go to Google Docs at docs.google.com and log in using your Google ID.
  2. Find your document in your list. By default, Google only lists the "active" documents, meaning that there have been recent changes. If you don't see your document in the list, click on the green Browse Docs & Spreadsheets tab on the upper right hand corner of the window, and then select all from the drop-down list. This will list all the files.
  3. Click on the file name on the list to open the file.
  4. Click on the Collaborate tab on the upper right hand corner of the window.
  5. You have two choices on how you can share this file. You can invite them as collaborators by entering their email address in the upper text box. Collaborators have access to view and change items on the document or spreadsheet. They can also invite others to view or collaborate.
You can also invite viewers by entering their email address in the lower text box. Viewers have access to view a file, but they cannot make any changes.
  1. Enter as many email addresses as you wish. Separate each address with a comma. Unless you have reasons to do otherwise, set the "Invitations may be used by anyone" option. This will allow people to change their email address to match that of any existing Google account they may already have.
  2. Click the Invite these people button. Google will confirm that you want to email the invitation. Press the OK button.
  3. Google will open up a dialog box. Type in a custom email message if you wish. By default, Google will send a copy of the message to your email address. You can turn this option off by clicking on the check box next to CC me.
  4. Once the person you've invited receives their email invitation and clicks on the link, they'll have access to your file. If they don't have a Google account, they'll be prompted to create one.
  5. You may want to use a Gmail address when possible, because some spam filters may block the invitation message.
  6. Always save a copy of your document to your hard drive before sharing, just in case someone makes changes that you need to reverse.
  7. Remember that collaborators have the power to invite others to view or edit the document, too.


April 13, 2013

Disabling the Automatic Restart option in Windows 7

Here's How:

  1. Click on the Start button and then on Control Panel.

    Tip: In a hurry? Type system in the search box after clicking Start. Choose System under the Control Panel heading in the list of results and then skip to Step 4.

  2. Click on the System and Security link.

    Note: If you're viewing the Small icons or Large icons view of Control Panel, you won't see this link. Simply double-click on the System icon and proceed to Step 4.

  3. Click on the System link.

  4. In the task pane on the left, click the Advanced system settings link.

  5. Locate the Startup and Recovery section near the bottom of the window and click on the Settings button.

  6. In the Startup and Recovery window, locate and uncheck the check box next to Automatically restart.

  7. Click OK in the Startup and Recovery window.

  8. Click OK in the System Properties window.

  9. You can now close the System window.

  10. From now on, when a problem causes a BSOD or another major error that halts the system, Windows 7 will not force a reboot. You'll have to reboot manually when an error appears.

April 7, 2013

7 Ways to improve Computer Performance and speed.


Everyone using their personal computer might have faced problem of slow performance or system hang problem. These are quite practical issues. There are many reasons which may cause your system to perform slowly. You must keep your computer resources clean and well organized to make it properly work. Here are some tips for increasing your computer's performance.
There are many tools available too over internet. you can even try some performance booster tool, but if you don't want to use some third party tool, then try to follow these tips. As I have personally tested these tips on many PC's. I am sure, you will notice some improvement in your system's performance.

1. Keep less shortcuts on desktop:

In our daily routine, we might need a large number of programs to access to complete our work. And we create shortcuts for almost every program we are using. And this is one of the main reason for slow performance. As these large number of shortcuts on desktop consumes a large amount of system's memory, which results in slow performance. Try to keep as less as possible shortcuts on desktop.

2. Keep Balanced Power Plan:

Some people use Power Saver battery plan to conserve battery. And obviously, power saver plan reduces your system's performance. Keep Balanced Power Plan while working on computer. You can use Power Saver plan when you are not using computer. Some people says that High Performance Power Plan improves system's performance, Obviously they are right. But, one thing you should notice here that High Performance Power Plan degrades your battery's health.

3. Install useful programs only:

Some people install a large number of software and applications. As these programs consumes more resources, and also make your file system un-organized. You should use full version software and applications, as these are free from bugs.  While Installing applications, read the info in the Wizard carefully, and do appropriate customization where possible. Like while installing some Web browser, it might ask you to install some toolbar, You must avoid installing toolbar if you really don't need them. These toolbar's consumes too much memory and also bandwidth.

4. Use updated Graphic Driver:

As your computer's display performance plays an important role in system's health and performance. So, use updated graphic drivers to stimulate your graphics efficiently. As these updated drivers are optimized for better performance. Updated graphic drivers helps in boosting system performance while playing games or some other large softwares.

5. Use Flash drive as ReadyBoost:

Its not  necessary that all of you have system with good graphic card. So, while playing games or using large software application, you need more system memory. And to fulfill this purpose, you can use your flash drive(Pen Drive) as Memory Booster.  Windows 7 and Windows 8 support this feature.

6. Connect Power supply for better performance:

While playing games or using some heavy software application, you need an optimized performance. And of course, at such situation, more power is  consumed by your system. So, Connect your Power supply while doing such heavy load work so that your system can perform better.

7. Run one task at a time:

Each task that your system perform uses a part of your system's memory. More number of simultaneous task, more will be the simultaneous memory consumption, which leads to slow performance. So, try to run least number of programs or applications simultaneously.

These are some of the tips which I think necessary to boost your system's performance.
If you have any other idea, then let everybody know via comments.

Break Fortiguard Web filtering, Bypass, Disable and Unblock Websense

 How to Break Fortiguard web filtering? 
   Fortiguard web filtering is software which is installed on networks specially in schools to prevent the usage of unwanted websites. The fortiguard web filter is very strong and blocks the website according to the categories defined by the administrator. Categories like social networking, under this it will block all the websites such as facebook, orkut, hi5,myspace. 

    Cracking or bypassing fortiguard with the help of software is very easy. For some software, admins rights are required for the software installation. You should not do it on your school computer because you will get caught anyway. For this, you should use your own laptop. However you can use portable softwares by taking them in the pen drive as they don't need to be installed. They run directly. 
By all the methods described below, other web filters like Websense, Met nanny, Norton parental,Safe eyes can also by bypassed and cracked.

Break Fortiguard web filter
Let's know how to crack fortiguard web filter in 3 easy steps. All 3 are very effective and you can use them at schools, universities and offices. But Keep always one thing in mind don't get caught. If caught you might get severe punishment for breaking the laws. Here they are..
If your school has blocked websites that you want to surf then you can use Web page translator to change the web page from one language to another. You can use two web page translator which are the best.
http://www.babelfish.yahoo.com - This is the best. Just go and type in the address and change the language selection to anything like spanish to english, or german to english. Now as the web page is already in the English, the translation will have no effect on web page and it will open the web page for you in english and you can browse it from there.
You can also use Google Web page translator. 
          For Facebook Opening Read This: Unblock Facebook, Its Applications and Games
Use secure Server connection - Certain websites use secure server connection. If your school has not blocked that then you can use it for example, 

https://www.gmail.com instead of http://www.gmail.com
https://games.microsoft.com instead of http://games.microsoft.com
https://www.kproxy.com instead of http://www.kproxy.com
These websites use secure connection and once you use s with http, the website will open whatever they type of blocking is.
Use of small Software - Here I am enlisting some software which are popular for bypassing and unblocking firewalls.
Freegate - Freegate is a small software however it has certain limits according to the country like it will not open all websites in certain countries. It opens only few selected websites such as facebook, youtube etc.
Ultrasurf - Ultrasurf has many versions. You can download any one of them. Once it connects to the server, it works very well.
Puff the magic dragon - This software is very good for watching youtube videos as I observed that the buffering is very good using this software.
Hot spot shield - It creates a VPN connection with its server then you can enjoy the whole internet behind the VPN server of the Anchorfree.
Your - Freedom - This is another good software. However you need an account for the software to run. You can do so by going to the website and making a free account. Once you are done then you can run the software. It will search for all the servers and connects you to the best possible server.
The last two softwares require administrator rights to install on the computer so you need to administrator account on the computer. The first 3 will run by itself.These software will destroy any firewall blocking once they are connected to their server. Just download them. They are very small and can be downloaded in second. No need to install first 3 software. They are portable too. Use it and browse your favorite website. 


April 3, 2013

How to configure Domain on Windows 7


Note : This article was written when Windows 7 was still in BETA 1, changes might occur later to the product once it is RTM.
You will have first to configure your networking settings, so that your machine would be able to properly communicate with your Domain Controller.
I have a Domain Controller that is configure to be a DNS Server as well, and has its IP address configured as : 192.168.1.1

My Windows 7 machine, is configured with the below settings:


To make sure that your PC can reach your domain controller properly, try to ping your DC, this will ensure that your PC is able to communicate with the DC, and hence can properly join it.


To join Windows 7 to a Domain, follow these steps:

  1. Click on Start > then right click on Computer and click on Properties


  2. The basic system information page will open, under Computer name, domain, and workgroup settings, click on Change Settings


  3. On the System Properties page, click on Change...


  4. Under Member of, select the radio button beside Domain: , type the name of the domain you want your Windows 7 to join and then clickOK


  5. A pop up box requesting to enter credentials of an account with rights to join the domain (with rights to create computer accounts), example of such user is one that is member of the Domain Admins Active Directory group. Once the username and password are typed, click on OK


    A confirmation pop up box will welcome you to the domain. Clicking on OK, will result in having another message informing that a reboot for the machine is required to apply the changes. Click on OK


    Close System properties page, and on the You must restart your computer pop up message box, click on Restart Now


  6. Once your machine is rebooted, press CTRL + ALT + Del to log on


  7. As you can see, the user that last logged on to the system was a local account user ( machine name\username ), and we need to log on to the machine with a domain user account, to do this, click on Switch User


  8. Click on Other User


  9. Type your domain user credentials and click on Enter key to log on. Note that, as seen in the below image, my domain name is stated under the username and password textboxes. If it happens that you have your local machine name is shown and not your domain name, then type the user name in this format : domain name\username


    If you want, after you log on to the machine, open the basic system properties page ( Right Click Computer > Properties ), and check your computer full name, and the name of the domain your machine is joined to.


Summary

In this article, I have shown you how to join Windows 7 to a domain and how to successfully log on to the machine with a domain credentials.